| 1 | Download the latest version of the Blog from the Members' Area. Be sure that you are running vBulletin 3.6.8 or newer! |
| 2 | Unzip the file to your hard drive locally. Warning: Be sure to maintain the directory structure when you unzip the file! |
| 3 | Upload the contents of the upload/ directory within the zip on top of your existing vBulletin directory. This is the directory with forumdisplay.php and many other files in it. Note: If you are upgrading, overwrite any files if prompted. |
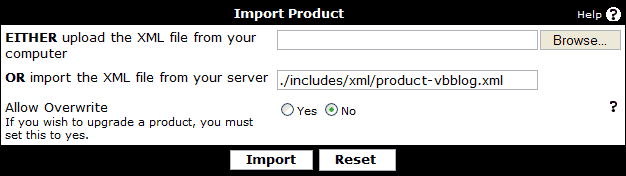
| 4 | Log into your vBulletin forum's control panel. Go to Plugins & Products > Manage Products > Add/Import Product |
| 5 |
Change Allow Overwrite to yes. |
| 6 | Click Import. |
Note:
There are more detailed instructions on how to unzip and upload files in the Installing vBulletin section. These may be helpful.
Note that there is no config.php configuration file in the Blog. You do not need to perform this step.
Note that there is no config.php configuration file in the Blog. You do not need to perform this step.