Welcome to the vBulletin Graphics Developer's Kit. This document will take you through the steps needed to get you started with customizing the vBulletin graphics to suit the colors of your own board.
All images in this kit are saved as Adobe Photoshop .psd files, in order to retain their layer information and facilitate editing. They were created in Photoshop 6.0 and ImageReady 3.0.
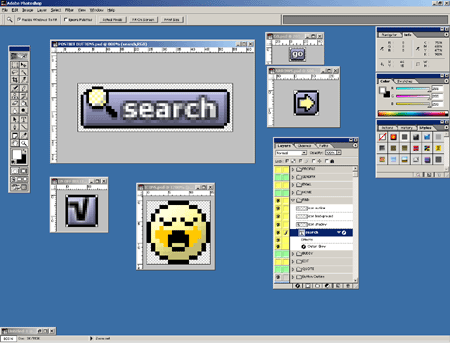
The PSD files included in the Graphics Developer's Kit are all that you will require to fully customize all the vBulletin buttons and icons to whatever extent you require.
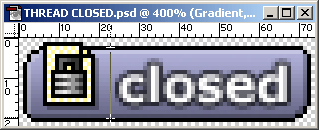
When you open up a file into Photoshop, you will usually see a single image, but the file you opened may actually be used to create several images. Let's take a look at the file THREAD CLOSED.psd.
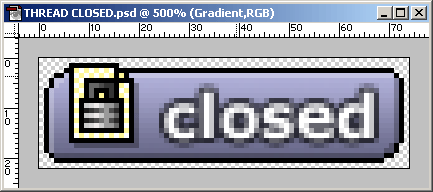
This file is only used to create one image (threadclosed.gif), but the PSD file still contains several layers in order to make it easier to recolor and edit.
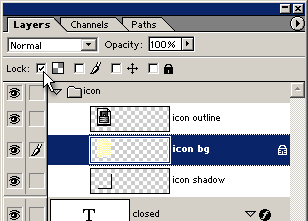
Take a look at the Layers Palette in Photoshop and you will be able to see the individual layers that are used to create this image.
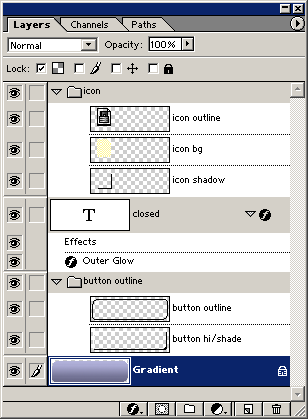
As you can see, the main constituent parts of the image are the Gradient background layer, the button outline layers, the text layer and the three layers used to create the small icon on the left-side of the button.
You can view individual layers by clicking the small icon

next to each layer, in order to hide it, and then selectively turning the layers you want to see back to visible mode.
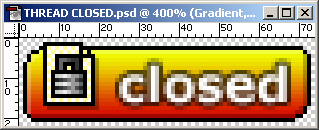
In order to recolor this image to suit your own site, you will need to recolor the Gradient and possibly the icon bg layers. This is how to do that.
Click on the Gradient layer in the Layers Palette, so that it becomes hilighted, as shown in the image above. You will now need to select a start and end color for your gradient. To do this, click on the colored boxes in the tools palette.
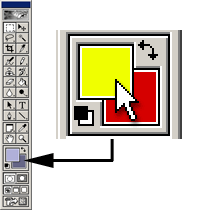
The color in the top-left box will be the starting color for your gradient, and the color in the bottom-right box will be the ending color for the gradient.
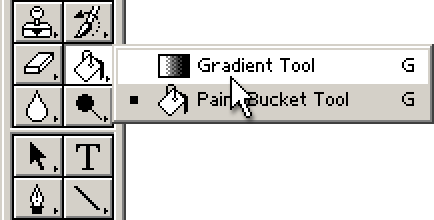
Next, you will need to select the gradient tool from the tools pallete. To do this, press G on your keyboard until the gradient tool is selected.
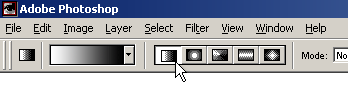
Ensure that the gradient type is linear by checking the tools options palette.
Now you will need to use the gradient tool to draw your new gradient over the existing one.
To do this, simply drag a line from the top of the image to the bottom of the image, then release the mouse button, and the gradient will be drawn. Don't worry about the gradient 'going over the edges' of the existing gradient - it has had its transparency locked, so the new gradient will not go anywhere it's not supposed to.
When you release the mouse button, the gradient will be drawn.
If you want to ensure that the line you draw with the gradient tool is perfectly top-to-bottom, without a slight angle, simply hold down the shift key while you draw the line.
If you also want to recolor the icon, click on the layer called icon bg and then click the checkbox to lock the transparecy of this layer, as shown here:
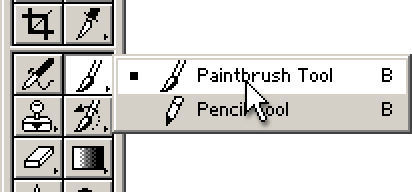
Now select the paintbrush tool from the tools palette by pressing B on the keyboard until the brush tool is selected.
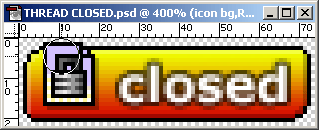
Now choose the color you would like to use, and paint all over the icon. Once again, don't worry about going over the edges, as the layer transparency has been locked:
The final step is to save out the GIF version of this image, for use on your board.
To do this, choose the Save for Web option from the File menu (or hold down Alt+Ctrl+Shift+S on the keyboard).
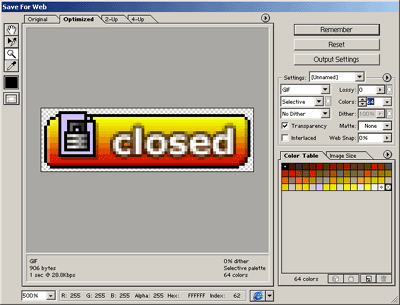
Probably the most important option that you will need to set is the color depth. This will directly affect the file size of the resulting image - the more colors you have, the larger the filesize. The file size is displayed in the bottom-left of the window. You will need to experiment to find the best compromize between image quality and file size. 64 colors will usually be sufficient.
When you are happy with the image, click the
[Ok] button to save the image. This will pop up a file window, where you can specify an filename.
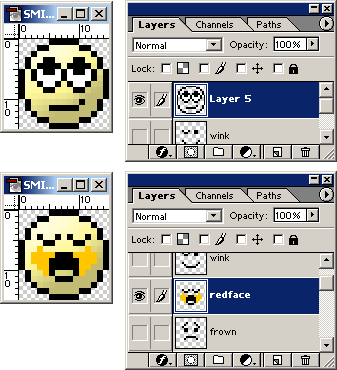
As was mentioned before, some of the PSD files are used to create two or more of the final GIF images. An example of this is the SMILIES.psd file, which is used to create all of the smilie GIFs with the exception of confused.gif.
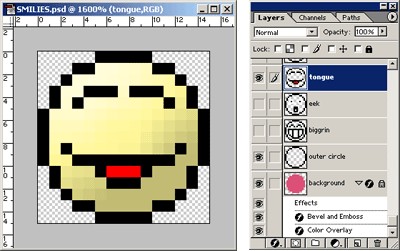
Creating the various different smilies requires you to hide some layers and show others - for example, to create the eek smilie, you will need to hide all layers with the exception of eek, background and outer circle. To create the tongue smilie, hide the eek layer and show the tongue layer. Showing and hiding layers is done by clicking the small icon next to the appropriate layer.

To change the background color of the smilies, you simply need to double-click the 'Color Overlay' effect applied to the background layer, and set a new color.
When you have finished creating a smilie, simply pull up the Save for Web control as shown earlier.